Sasha sits in the front room and asks, "What is with all these boxes they've loaded into the front room?"
Estelle Jan 2007
Friday, November 16, 2007
Kitchen / Family Room During Remodel
Looking east into what was originally the kitchen. Now, the walls are painted (and smooth - with a plaster finishing technique). We chose the color Sand Dollar (from Sherwin Williams super paint) because it is soft and comfortable. During the day, the walls take on a very warm tone. There are 9 can lights in the family room and another 9 lights in the kitchen - makes for a very bright room . A ceiling fan in the center of the room contributes to the home-y environment of Estelle. I think John and Catherine Nelson would be proud.
Here is the dividing wall between the family room and the kitchen. The kitchen cabinets will end here.
Here is what was the family room - and is on its way to becoming the kitchen. With an old house, you always have to be ready for compromise and change - and Estelle gave us her share of challenges.
The raised ceilings (compared with the 8' previous ceilings) are a dramatic improvement.
Anya stops in to check out the newly laid imported Italian tile. Behind where the new pantry cabinets will be, we left some of the old wallpaper for those who renovate Estelle next time to find. (We've been stashing little 'finds' throughout).
Kitchen / Family Room Before
This shows the family room - SW room on the main floor.
Notice that the ceiling has been lowered - visible by the height of the door trim (which was trimmed to accommodate the lowered ceiling).
The door shown exits to the west side of the house. Later, you'll see how this room becomes the location of the new kitchen.
Here is a view of the kitchen. The window shown here is on the East side of the house. Notice the water pipes that reach up to the second story bathroom.
When we ripped out these cabinets and started tearing out the wall (to open this area into the NE room), we found that there was originally a door here that had been boarded up and plastered over years ago.
This is in the kitchen looking to the SW. The doorway next to the fridge you'll notice in the remodel, but the wall (on the right side of the picture) is torn out.
Wall between kitchen and family room is being torn out.
This picture was taken from the kitchen area (notice the tile floor) looking west out the back door. In this picture, you can see that we've ripped out the lowered ceilings and took down the heating ducts (that's why the ceilings had been lowered).
No more cabinets in the kitchen. Notice where the old ceiling stopped - the wallpaper pattern meets the white walls.
Now, the fireplace sits between these two windows.
Hurry before winter gets here!
Yipee -The gas fireplaces are installed (not yet working) but we're on our way. The house originally would have had a heatilator in every room (a sign of the owner's wealth in the time). I'm sure they helped keep the home warm.
The Campbell's told us about a large cast iron grate/vent that was to the west of the stairs in the hall - and directly above an old coal furnace. The grate would get very hot - but because of its central location, would help warm the house. We do have the furnace back up and running. It was starting to get cold without it.
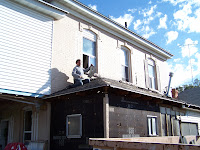
Ripping down the porch that was converted into the main floor bathroom. This is the South side of the house.
As we ripped off the siding of the west porch, we discovered that the second story was supported on the south and north sides each by a 3/4 inch thick piece of wood. Wow!
No wonder the dogs didn't like to go out onto the second floor porch. :)
You can see our wall support we constructed before we ripped out the corners and replaced them will new walls.
A close up of the SW corner support before we tore it out.
Here you can see the view as we ripped down the old walls of the porch to replace them - and prepare for windows.
Subscribe to:
Posts (Atom)